该篇文章介绍多对多的关系介绍
一、数据库设计
一个作者对应多个书籍
一个书籍对应多个作者
总结也就是多对多之间的关系
通过模型类创建多对多之间的关系表的时候,Django框架通过ORM创建三个表,分别是作者表,书籍表,记录作者id对应书籍id的表
如下:
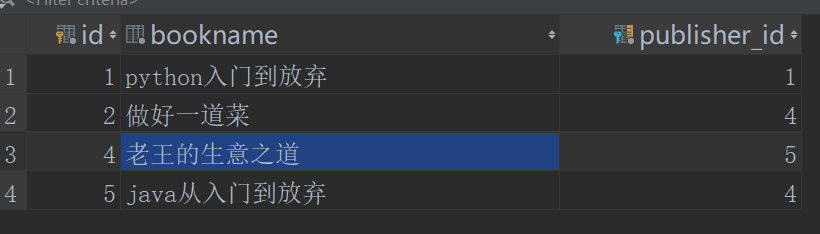
书籍表Books
作者表Author

作者书籍表author_book

二、代码部分
models.py代码部分:
class Books(models.Model):
    """
    图书模型类
    """
    id=models.AutoField(primary_key=True) # 表的id,AutoField是自动增长,相当于设置auto_increment
    bookname=models.CharField(max_length=24) # 表的name,CharField是数据库中的varchar,max_length必须设置
    publisher=models.ForeignKey(to="Publisher") # 表的外键,这是一对多关键的所在,to="Publisher"表示关联Publisher模型类的主键

class Author(models.Model):
    id=models.AutoField(primary_key=True)
    author=models.CharField(max_length=24,unique=True,null=False)
    book=models.ManyToManyField(to="Books") # 多对多关系ManyToManyField
查:
urls.py
url(r'^author_books/$',show_author),
views.py
def show_author(request):
    all_authors=Author.objects.all() # 查询所有的作者
    # 通过后端获取id=1的作者名下的所有书籍
    # Author.objects.get(id=1).book.all()
    return render(request,"allauthor.html",{"authors_list":all_authors})
allauthor.html
<!DOCTYPE html>
<html lang="en">
<head>
    <meta charset="UTF-8">
    <title>Title</title>
</head>
<body>
<form>
    <a href="/app04/addauthor/">添加作者</a>
    <table border="1">
        <tr>
            <td>ID</td>
            <td>作者</td>
            <td>书籍</td>
            <td>操作1</td>
            <td>操作2</td>
        </tr>
        {% for authors in authors_list %}
        <tr>
            <td>{{ authors.id }}</td>
            <td>{{ authors.author }}</td>
            <td>
                {% for b in authors.book.all %}
                    {% if forloop.last %}
                        {{ b.bookname }}
                        {% else %}
                        {{ b.bookname }},
                    {% endif %}
                {% endfor %}


            </td>
        <td><a href="/app04/deleteauthor/?id={{ authors.id }}">删除</a></td>
            <td><a href="/app04/editorauthor/?id={{ authors.id }}">编辑</a> </td>
        </tr>
        {% endfor %}
    </table>
</form>
</body>
</html>
总结:
多对多关系之间的设计,给表添加一个models.ManyToManyField(to="关联的表")
例如:表A和表B是多对多关系
表A:id,name,a_b=models.ManyToManyField(to="B")
表B:id,name,b_a=models.ManyToManyField(to="A")
例:获取表A中id=1数据下的所有数据(B中保存的)
A.objects.get(id=1).a_b.all()
====================================================================
增:
views.py
def add_author(request):
    if request.method=="GET":
        all_books=Books.objects.all()
        return render(request,"addauthors.html",{"books_list":all_books})
    if request.method=="POST":
        get_author=request.POST.get("addauthor")
        get_books=request.POST.getlist("addbooks")
        create_author=Author.objects.create(author=get_author)
        create_author.book.set(get_books)
        return redirect("/app04/author_books/")
addauthors.html
<!DOCTYPE html>
<html lang="en">
<head>
    <meta charset="UTF-8">
    <title>Title</title>
</head>
<body>
<form action="/app04/addauthor/" method="post">
    <input type="text" name="addauthor" /><br/>
    <select multiple name="addbooks">
        {% for book in books_list %}
            <option value="{{ book.id }}">{{ book.bookname }}</option>
        {% endfor %}

    </select>
<input type="submit" valule="添加作者"/>
</form>
</body>
</html>
总结:
1.其中获取复选框获取多个id值:request.GET.getlist("参数名")或request.POST.getlist("参数名")
2.添加数据(全部借助上面的A,B表,其中假设A表是作者表,B表是书籍表)
添加作者名字为张三,著作有:书名1,书名2
add_author=A.objects.create(name="张三")
add_author.a_b.set(获取的多个书籍id)
=======================================================================
删:
views.py
def delete_author(request):
    get_id=request.GET.get("id")
    if get_id:
        Author.objects.get(id=get_id).delete()
        return redirect("/app04/author_books/")
总结:
删除作者id=1(肯定也要删除作者下的书籍)
A.objects.get(id=1).delete()
========================================================================
改:
views.py
def editor_author(request):
    if request.method=="GET":
        allbooks=Books.objects.all()
        get_id=request.GET.get("id")
        if get_id:
            author=Author.objects.get(id=get_id)

            return render(request,"editorauthor.html",{"books_list":allbooks,"author":author})
    if request.method=="POST":
        get_id=request.POST.get("authorid")
        get_author=request.POST.get("editorauthor")
        get_booksid=request.POST.getlist("updatebooks")
        update_author=Author.objects.get(id=get_id)
        update_author.author=get_author
        update_author.book.set(get_booksid)
        update_author.save()
        return redirect("/app04/author_books/")
editorauthor.html
<!DOCTYPE html>
<html lang="en">
<head>
    <meta charset="UTF-8">
    <title>编辑作者</title>
</head>
<body>
<form action="/app04/editorauthor/" method="post">
    <input type="text" name="authorid" value="{{ author.id }}" style="display: none"/><br/>
    <input type="text" name="editorauthor" value="{{ author.author }}"/><br/>
    <select multiple name="updatebooks">
        {% for book in books_list %}
            {% if book in author.book.all %}
                <option selected value="{{ book.id }}">
                    {{ book.bookname }}
                </option>
                {% else %}
                <option value="{{ book.id }}">
                    {{ book.bookname }}
                </option>
            {% endif %}
        {% endfor %}
    </select><br/>
<input type="submit" value="更新"/>
</form>
</body>
</html>
总结:
update_author=Author.objects.get(id=get_id)
update_author.author=get_author
update_author.book.set(get_booksid)
update_author.save()